
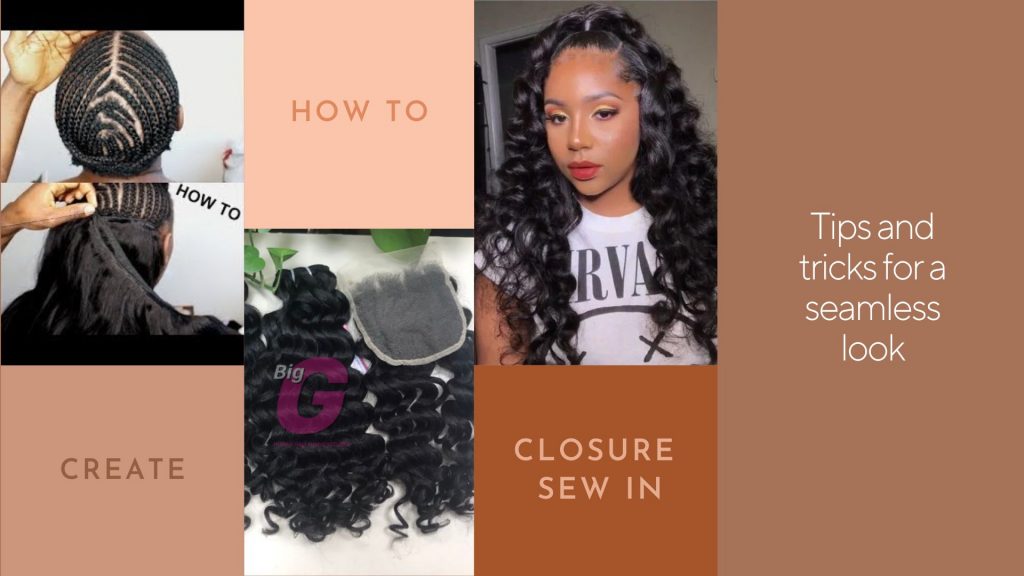
Instead of using a lace closure to make a closure wig, there are two common ways to fix your weavon with closure: with and without glue. While using glue installation is easier than sew-in method, you may risk damaging your hairline. On the other hand, closure sew in is not as hard to do as you imagine. So, today, BigG Hair is sharing with you a detailed guide on how to make a closure sew-in weave with a full demonstration. Let’s start!
What you need to make a full sew-in weave with lace closure?
Thread and needles
It’s a good idea to have more than one needle on hand so you can thread both needles and use them one after the other without having to re-thread.
Lace closure and human hair bundles
How many bundles of human hair wefts do you need for a full sew-in weave with closure?
The amount of bundles you need depends on how long you want your weave to be. If want to get 8-14 inches, two bundles will usually be enough to cover the entire head. If you want a longer look like between 16 and 22 inches, you’ll need to buy at least three bundles. If you want your hair to be longer than 22 inches, you should obtain at least four bundles to cover the entire head without losing volume.
Human Hair Bundles for Closure Sew in
How to make a closure sew in weave?
Step 1: Wash your hair
Since the wefts and lace closure will be in your hair for a long period, make sure you wash your hair before you start sewing. It’s better to use a clarifying shampoo to make your hair freshly clean. After you’ve finished, use a conditioner to moisturize your hair. Also, make sure your hair is completely dry before you conduct the next steps.

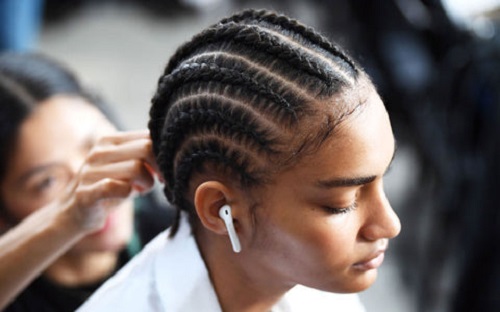
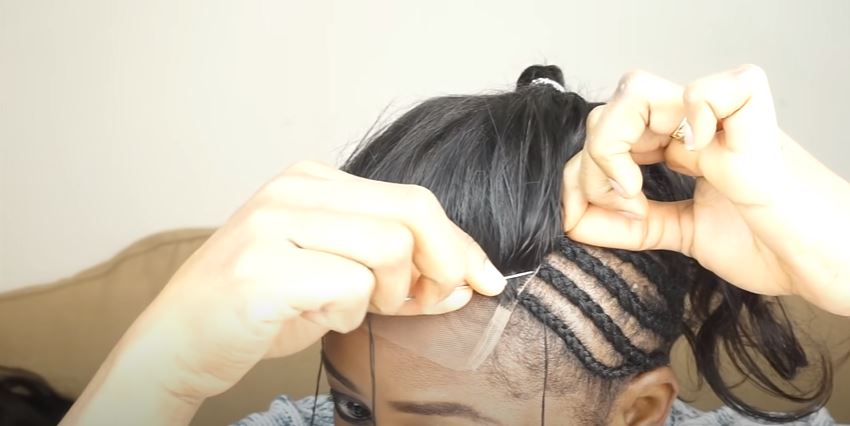
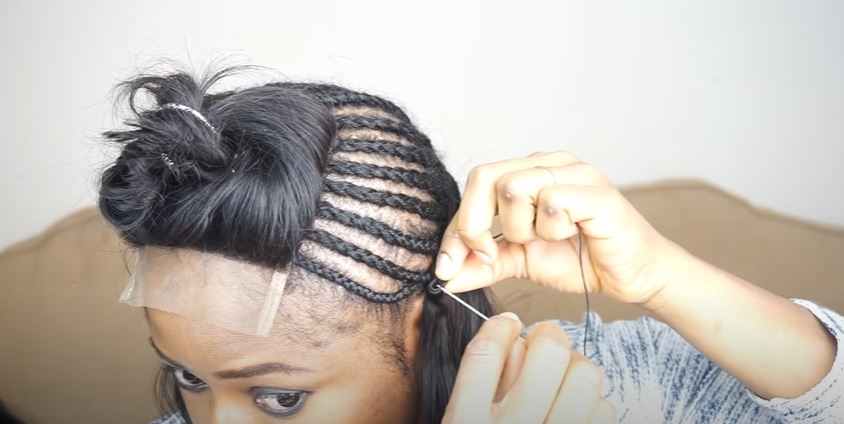
Step 2: Make cornrow braids
Part your hair in the direction you want your final style to go. You can cornrow your hair using your method. Just sure that each braid emerges from that section. Make sure your braids are small and that you have the cornrow braids all the way down your hairline (especially the front).
The braids must be small in order for your foundation to be flat. A flat foundation improves the overall appearance of your closure sew in, giving it a more natural appearance.
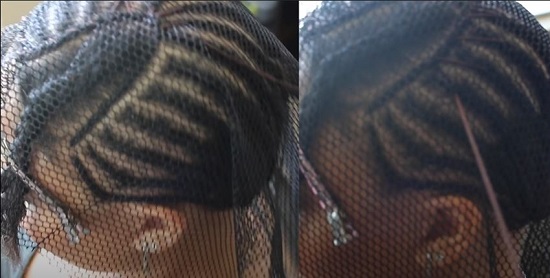
Step 3: Put a weaving hairnet into your head
This step is not compulsory. If your hair is thin and you want to sew in as many wefts as possible to add fullness, this is the way to go.
To attach the netting to your cornrow’s edge, you can use whipstitching. You should begin sewing from the back center of your head and work your way to the front center. Sew through the netting a couple of times until you get back to where you started, then knot and cut the thread. After that, cut the excess net as close as possible to your edge cornrow and stitch.
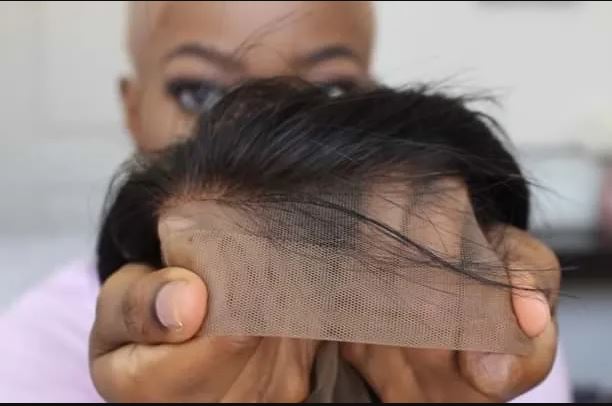
Step 4: Place your lace closure into your head
You can place the lace closure depending on where you part the cornrow braids. This could be in the top center of your head or slightly off to the side. Make sure the straight edge is aligned with your front hairline and overlaps it by a fraction of a centimeter (0.39 in). Your lace closure must lie down completely flat. There should not be any space between the lace closure and your natural hair.
Step 5: Sew the lace closure
You will need to sew the front part you the lace closure first. Start sewing on the left side of your lace closure and work your way to the part, then back to the side edge. Then, repeat the process on the right side.
After you finish sewing the front part, move to the sides. Start sewing your lace closure’s left side and work your way back to the rear center. Rep this step on the right side, finishing where you left off at the back. Trim the excess threads after you’ve knotted the strands together.
Make sure you sew all the way through the netting. And if you come across a cornrow, just sew through it.
Step 6: Clip the hair of lace closure
It’s better to clip the hair of the lace closure out of the way so it will be easier for you to sew the weft tracks. You can make a loose bun with the hair on the lace closure and fix it with a clip.
Step 7: Sew the weft tracks
Your first weft tracks should be in the bottom section. That means you will sew from the bottom of your head to the top part where the lace closure lies.
Tack a weft to an edge cornrow with the curved needle. You can start from the left ear position. Before continuing to sew, tie a knot for the first stitch for extra safety. Your wefts will be more stable and easy to handle. After that, continue sewing until the top of the right ear. Then, fold the weft towards the left side and continue sewing the weft tracks to the cornrow braids back and forth across your head until you meet the lace closure.
You will sew the final weft track directly onto the netting and as close to the laced hair as possible. Make some tight knots here and now you’ve got the new look with your closure sew in.
How long does a closure sew in weave last?
Normally, a full sew-in weave with closure can last from 8 to 12 months, depending on how fast your hair grows and how you maintain your weave.
How to style weave with closure?
You can curl your weave with closure using a flat iron. Yet, make sure to spray heat protectant before you start curling. Pulling out some baby hairs or creating some edges can also be a great way to style your weave with closure.
If you want to change your closure sew in hair’s color, you should dye the hair on lace closure and wefts before you start sewing. It’s much easier to do and you will not stain the hair dye onto the net and your real hair.
To make your weave with closure look more natural, let’s follow some tips on “10 action tips on how to make closure look more natural“.
Conclusion
While you can go to a hair salon to get a closure sew in with full services, it will cost you an arm and leg. Regularly, the price for getting a partial and full sew-in weave with closure ranges from $100 to $300. So, if you want to cut the cost, you can try our guide above. By buying lace closure and human hair bundles from BigG Hair, you can get a stunning look at the best price.