
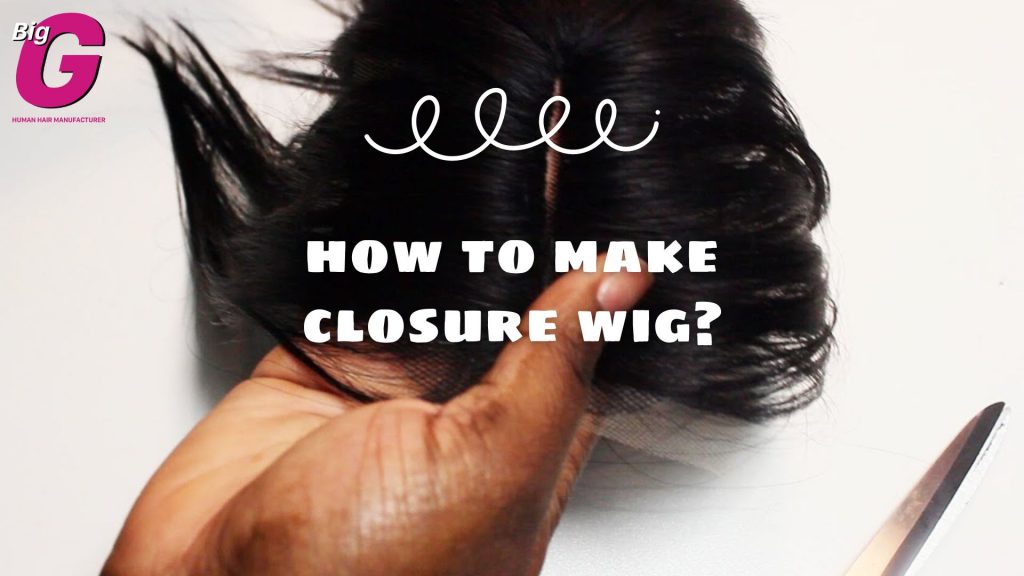
Closure wig is a wig made with a closure and some bundles of human hair weft. This kind of wig is quite widely used among wig users. So, how to make wig with closure? Let’s follow the step-by-step guide below.
What you need to make a closure wig
Before you start making your first closure wig, let’s gather all the needed stuff first.
- A wig head or a mannequin head
- Wig stand
- Tape roll and pins
- Curved needle and thread
- Adjustable dome wig cap
- Wig combs
- Scissors
- Lace closure (with the size of your choice) and 3-4 hair bundles
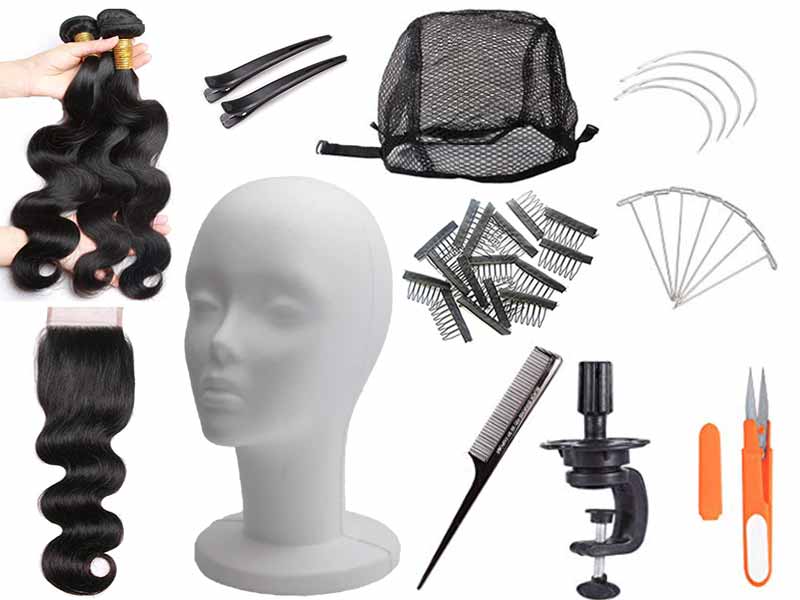
You can easily buy many of these tools online or at your local beauty supply store.
How to make wigs with closure?
Step 1: Set up your wig head
To make your wig easier to construct, keep your wig head firm while you work on it. You can use tape to secure your wig head to a wig stand or to a chair or table. This will help you do the work easier.
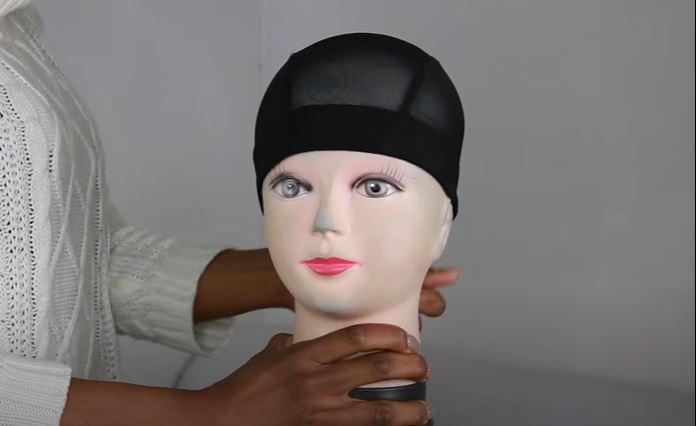
Step 2: Put on your wig cap
Place your wig cap over the wig head. Make sure you know where your wigs will be placed (front and back). You can use some pins to hold the wig cap in place.
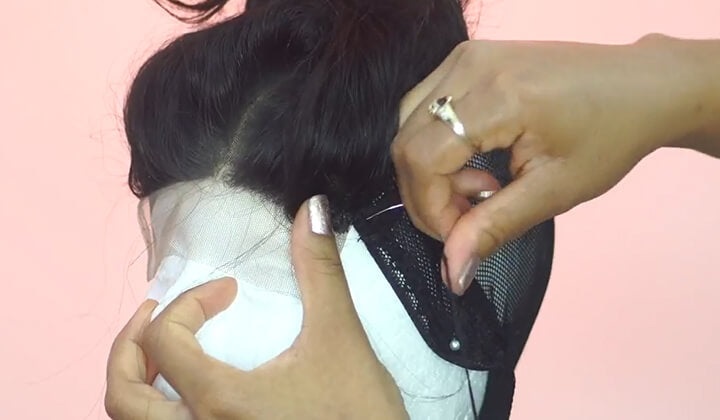
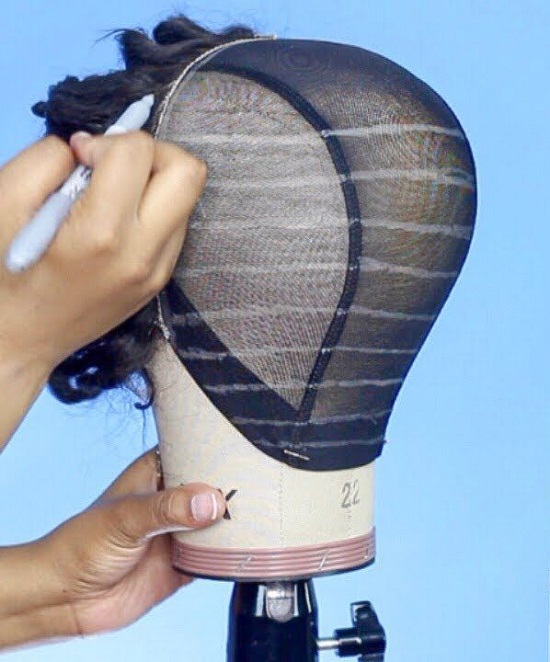
Step 3: Attach your lace closure
You should start with sewing the lace closure and then adding the rest hair wefts. This will allow you to see how much hair you’ll need and where you’d like the closure to be placed on your head.
Here is how you should do: Put your lace closure at the front top of the wig cap. Then, pin it in place with pearl-headed pins. After that, use the needle and thread to sew it all the way around the cap. To guarantee that the lace closure is secure, make tight stitches, especially at the beginning and end of stitching knots.
Step 5: Prepare the tracks
After you’ve done sewing the lace closure, you can start adding the tracks. However, for new wig users, it may be a bit hard to do. So, we suggest you use tailor chalk or a pencil to draw the lines for the tracks first. By doing so, you can also know how many tracks and hair wefts you will need.
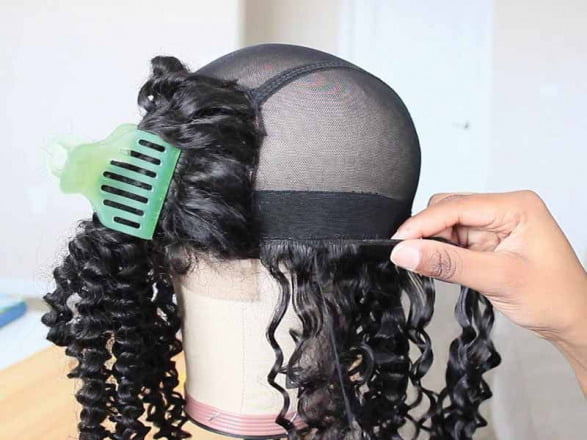
Step 6: Add the tracks
When it comes to adding the hair weft, there are several ways to do it. You can use a needle and thread, hair glue and a blow dryer, or a hot glue gun and glue.
Sewing the wefts to your wig cap is the most common method to add the tracks, but it takes the longest to install. Hair glue and hot glue are both quick, but hot glue is a little more durable. However, because the glue is hot, it must be handled with caution.
Yet, for permanent use, it’s still better to sew the tracks. You should sew along the wig cap’s bottom edge first, starting with the first track from one side of the lace closure to the other (near the nape of your neck). When you get close to the edge, tie a knot. After that, if there is any excess track, simply cut it off. If the excess track is long enough to go around another way, fold it neatly and press it to avoid dash. Then do the same thing on the other side.
When you’ve finished stitching all of the tracks to the lace closure, sew the last one and knot it, then cut the excess weft.
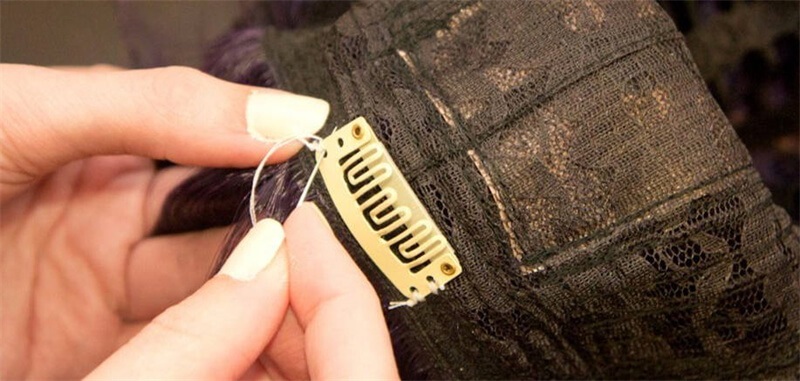
Step 7: Add a wig band
To make your closure wig more secure while wearing it, you can sew a wig band and wig combs to the inside.
Step 8: Cut the excess lace and wig cap
Remove your wig from the wig head once you’ve completed all of the previous steps. Then, cut the excess wig cap. Make sure you don’t cut into the knot when performing this step. If you like, you can cut the extra lace. Also, don’t cut too near to the hair, or you’ll mess everything up.
Step 9: Style
Now that you’ve completed your closure wig, it’s time to style it. You can curl it or create parting styles for a better look. If you want to color your wig, make sure you do it before you construct the wig.
Though you may not get the best wig for the first try, it’s ok. Just master the above guide on how to make wig with closure and improve your wig-making skills. You will then achieve a stunning closure wig that levels up your look.
And if you are finding a place to purchase lace closure and human hair weave for wig making, pay a visit to BigG Hair. You will have a wide range of options for hair length, texture, and color. Our 100% human hair will surely bring you the most natural look. But if you want to skip this wig-making process and get the desired look right away, let’s add BigG Hair’s 5×5 closure wig into your cart. Our 5×5 closure wig covers a larger area of your scalp, allowing you a natural look and diverse parting styles. So, contact BigG Hair now to get your favorite items!